Let’s start off with some fun stuff: personalizing Worksuite with your own branding.
In this lesson we’re going to walk through all the things you can custom-brand and make Worksuite into your very own seemingly proprietary workforce management system.
As far as your talent knows, they are logging into your custom-built platform!
With your Essentials plan, you’ll be able to personalize:
- Logo
- UI Theme Color
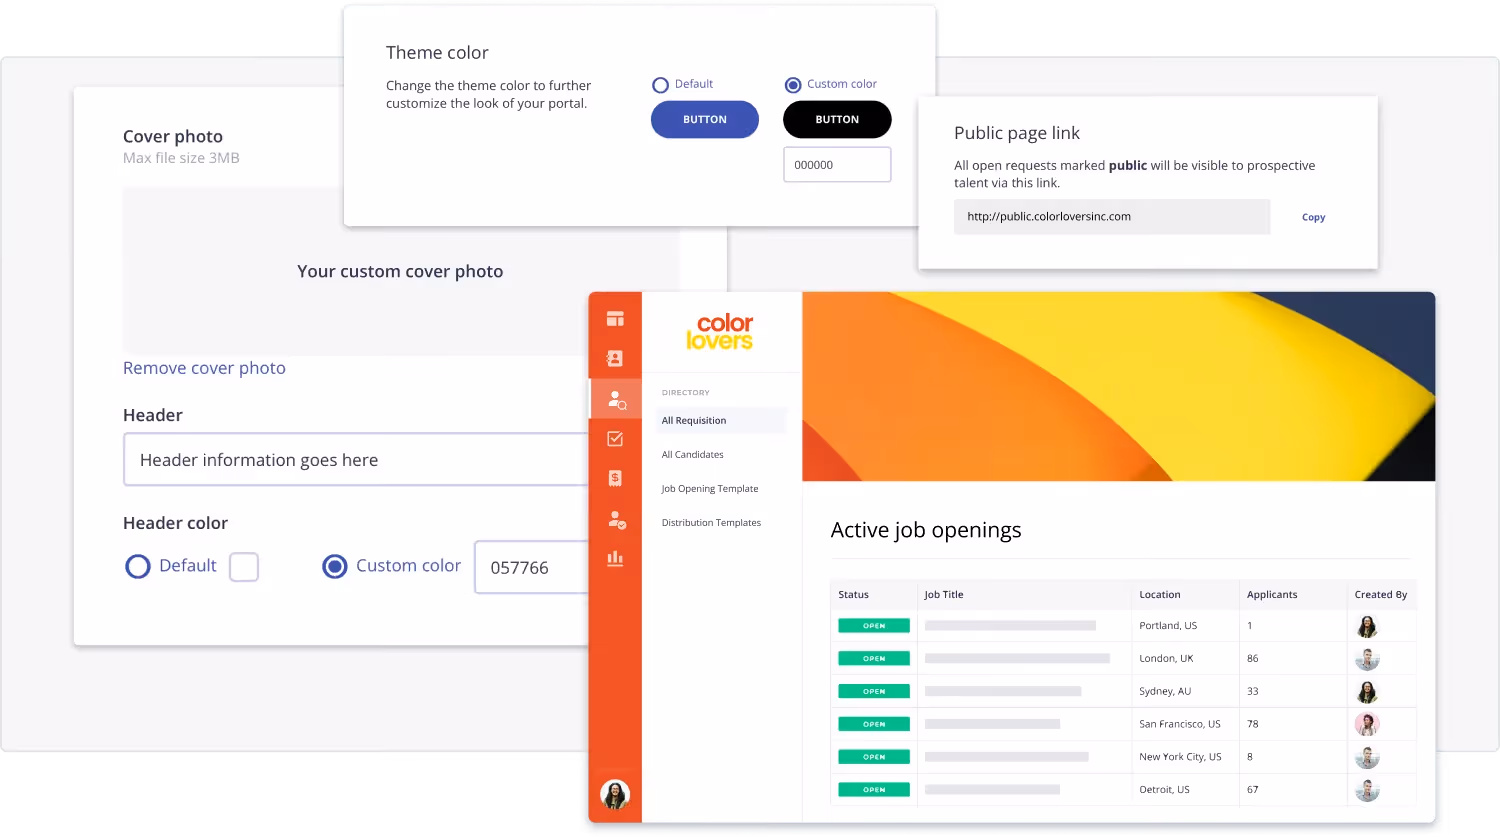
- Branded Public Portal
- Button Colors
Let’s get your Company settings done first, and then we’ll customize your Public Portal.
Did you know? You can take it to the next level with our Custom Branding add-on package, by branding every touchpoint with email notifications + a custom URL (talent.yourbrand.com). Talk to us if this is something you’re interested in!
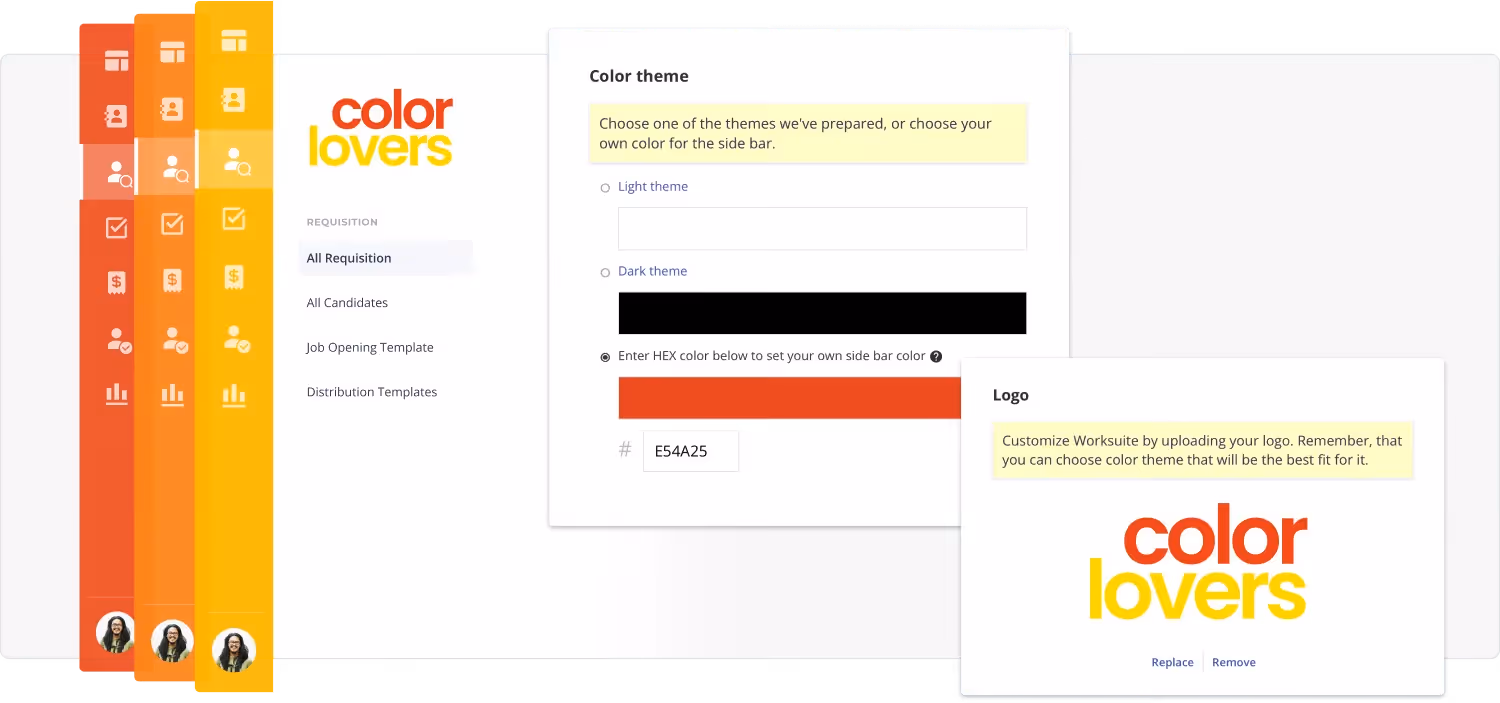
How to Brand Your Worksuite Environment
- Click your face in the bottom-left corner, and go to Settings
- Under Settings click Company profile
- Now, change your Color theme to a custom HEX color code for your sidebar (this appears throughout yours, your team’s and your talent’s views everywhere in the platform)
- Upload your Logo
- Accepted file types are PNG, JPG, GIF
- Landscape format tends to fit best (approx. 190x45 pixels or similar ratio)
- Optional: Choose a Favicon that’s 32x32 pixels, .ico file (this is a smaller version of your logo appearing in browser tabs)
- Make sure you click SAVE after any changes, and you’re good to go!
Go ahead and do that now, and we’ll see you in the next lesson.
Tools & Resources
- Custom Branding to Personalize Your Freelancer Management System (Blog)
- HEX Code Color Picker (upload a photo and click to find the HEX code)
- Coolors.co (Color Palette Generator)
Exercise
- Personalize your Worksuite environment with your logo & brand colors!
- Set up your Public Portal with custom header image and copy.
Next lesson
Overview: Settings
View →