In this lesson we’re going to walk through the Payments/Invoices module of Worksuite.
Why is this so important?
Well, if payments are going out, that means work is getting done. The beauty of Worksuite is that all your invoices & payments are tied to Tasks, and the Talent Profiles who did the work — so you have a clean audit trail and full visibility into your freelancer spend.
The Payments module will allow you to:
- Streamline invoice management with all of your payments in one clean, intuitive dashboard.
- Link your payments with the specific projects and assignments to easily track spending and stay in budget.
- Allow your freelancers to create their own invoices for payment (tied to Tasks), making it faster and easier to get approved and paid.
- Make your Finance team’s life easier. Happy team, happy freelancers, happy you!
- Save countless hours of admin work, that you can now free up to focus on what matters.
The main features we’ll cover in the video lesson:
- Payments Table View – main buttons to know
- The 5 statuses of the Payments cycle
- Approving or Rejecting Invoices
- Adding Expenses
- Export Payment Data
- Audit Trail
- Bulk Actions on Payments/Invoices
Save 100s of emails a week! Worksuite sends auto prompts to make sure each freelancer is payable (i.e. has filled out the correct bank & tax info). This eliminates all the back-and-forth you used to have to do, chasing down payment details via email.
You can also use bulk actions to send reminder messages to any contractor who hasn’t finished onboarding. (See lesson on Statuses & Bulk Actions.)
Payments Table View

The 5 Statues of the Payment Lifecycle
- New - New payments will be in the unpaid category when you or your talent creates a new invoice. This status indicates that the payment is still in the initial stage and is yet to be approved for payment processing.

- Approved - Payment will be in the Approved status when you approve an invoice. This status indicates that the payment is approved and ready to be scheduled for payment, but has yet to be scheduled (Worksuite Pay).

- In-Flight (Worksuite Pay) - This status indicates that the payment is on its way and will be available in your account in 1-2 business days for local transfers and 5-6 working days for international wires.

- Paid - Payment will be in Paid status once it has been processed and should be available in your bank account. This generally happens 5-6 working days after processing begins, but can take longer if there is an issue that needs to be solved.

- Rejected - You can reject an invoice and you can it back to the talent to revise or edit the submission.

Approving or Rejecting Invoices
Worksuite helps you automate payment communications with your talent.
- Invoice approvals - the system will automatically send an email notification to the talent when their invoice has been approved.
- Invoice rejection - if you have the need to reject an invoice, you can add a personalized note so the talent will understand the reason for rejection and can correct it.
Adding an Invoice
Invoices can be uploaded by your talent or generated internally when timesheets, tasks, and milestones are approved.
- Talent profiles - invoices can be uploaded by talent, directly from their dashboard
- Tasks - completed & approved milestones and tasks prompt the user with the option to generate an invoice based on the agreed-upon rate
- Timesheets - timesheet approval will prompt the user with the option to generate a payment
How to Add an Invoice
- In the Invoices module, click on “Add Invoice” and a pop-up will appear
- Fill in the fields in the pop-up
- Partner (Talent)
- Total Amount
- Upload expense file (optional)
- Expense name
- Tasks and Projects (optional)
- Best practice to connect an invoice with a task for record-keeping
- Note (Optional)
- Payment due date (Optional)
- Click on “Send”
- The invoice will appear in a NEW status
Exporting Payment Data
Need your payment data on demand? The Payments Report feature will help you save time by downloading all payments in CSV format to quickly sort through the data!
Downloading reports in the payments module
- In the Payments module, click the ellipses (3-dot) dropdown menu next to the “Add Invoice” icon.
- Click on “Export”
- Enter the desired date range
- Please note that the date selection refers to the date on which the invoices were created
- When you click the Download button, payments will be exported in .csv format.
- Please note that the date selection refers to the date on which the invoices were created
- Manipulate payment data as needed - When the export is complete, payments in all statuses are available. Use the filtering functions in your spreadsheet editor to manipulate the data for other views.

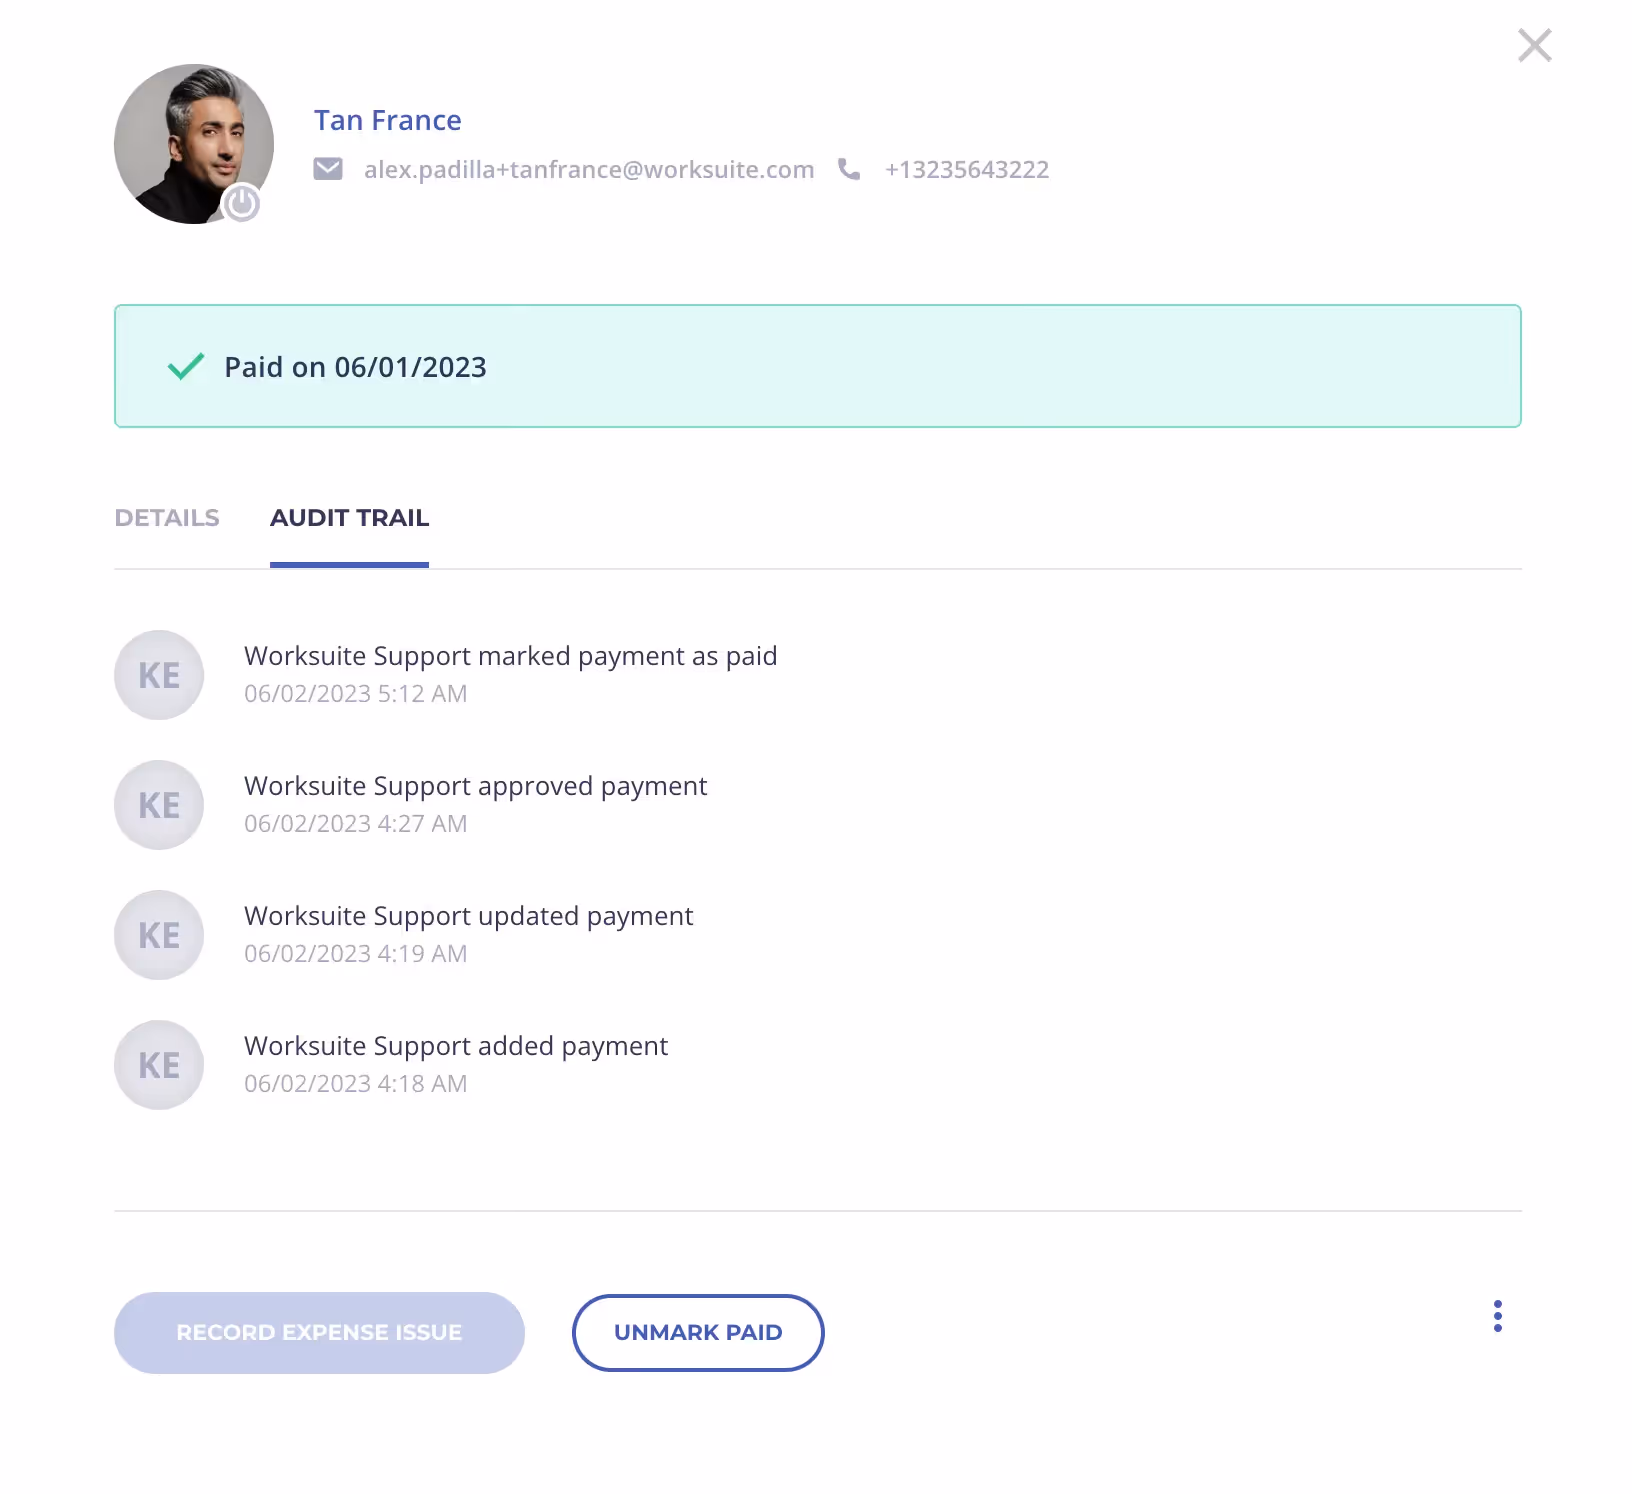
Audit Trail
Maintaining a comprehensive and complete audit trail for payments is pertinent for finance teams. Worksuite makes it easier to track each record of when a payment was raised, approved, and all the way to paid.
To view the audit trail of an invoice
- Click on the desired invoice
- Click on the “Audit Trail” tab
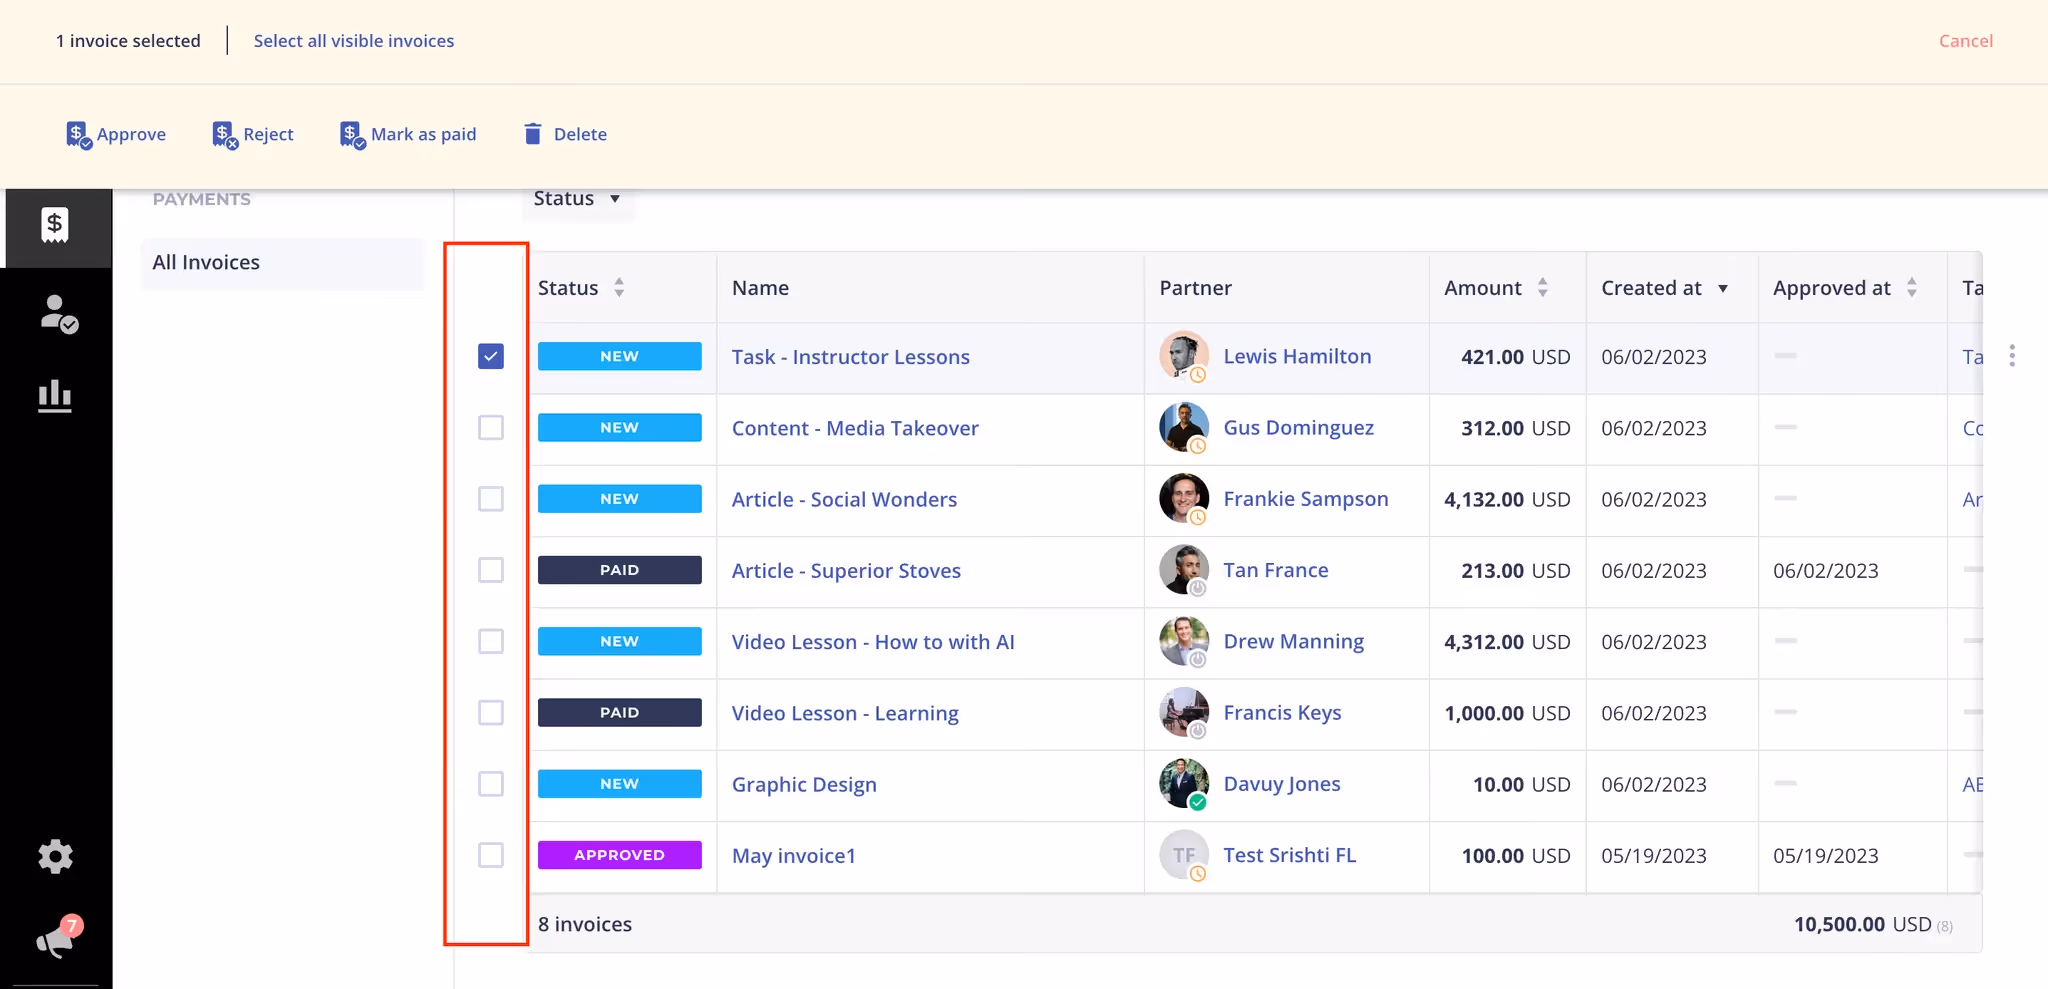
Bulk Actions on Payments/Invoices
Speed up your time by using Bulk Actions within the Payments module. Hover your cursor over the white space next to a payment, and a checkbox will appear for you to click into. Click one of the boxes, and the Bulk Actions menu will appear.
You will have the ability to:
- Approve
- Reject
- Mark as paid
- Delete
Next lesson
PDF Invoice Forwarding
View →