In this lesson, you’ll get an overview of our project collaboration module, Tasks and Projects.
Here, you can assign, track and manage work with your talent. Automatically assign work using our “opportunities to tasks” workflow, or create tasks manually as needed.
Later in the course, we’ll even show you how to auto-generate an invoice directly from a task.
Read below to learn more about this flexible feature!
In the following lessons, we’ll cover:
- What are Tasks and Projects?
- Creating a Task and Project
- Adding Custom Fields on a Task and Project
What are Tasks and Projects?
Tasks and Projects make up a project collaboration module that allows you to quickly allocate tasks to your freelancers for your project. Keep tabs on their progress and milestones, and make work happen sooner than later.
Different work, different rate
We get it — no two tasks are the same. You can choose a preferred rate for the task at hand, and invite your contractor to start the work in seconds.
Birds eye view
Keep an eye on budgets, milestones and deadlines in one real-time dashboard. Share visibility amongst your teammates without the fuss. Once your project is up-and-running, you can securely store, share and access all relevant documents in one place.
Collaboration
Work together with your freelancers directly within the task to make sure milestone deadlines are met, and work is completed on-time and on-budget.
Introduction to a Project
Projects can be designed to help you track costs and calendar — to help you ensure all associated tasks are aligned to deliver results on time and on budget. To do this, add your overall budget and project start/end dates when creating a new project.
Any associated task costs will automatically be attributed to your overall budget. In addition, tasks will only be created within the assigned project timeline!
Introduction to a Task
Tasks give you the flexibility to be as detailed (or basic) as you need to ensure talent has the information they need, and your internal team can track necessary details. When creating a task, you'll encounter standard required and optional fields to ensure your data is aligned. You can also create custom fields designed by you for your business needs.
Status types in tasks
The status of your Task makes it easier to follow its progress from the time it is created and put live until completion. You can also filter by task status in your All Tasks view:
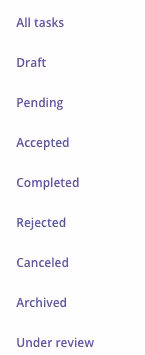
Below are the statuses of tasks:
- Draft - When a task is created, it is always in 'Draft' status unless it is made live.
- Pending - Once the task is open and made live, the status of it is changed to 'Pending'. The pending status indicates that the task needs to be accepted or rejected by the talent to whom it is assigned. The talent will receive an email notification to approve or reject the task.
- Accepted - If the talent clicks on 'Accept' to accept the task, the status of the task changes to Accepted. The work will now begin.
- Completed - The task status will change to Completed once the Task Manager marks it as completed.
- Rejected - If the talent clicks on 'Reject' to reject the task, the status of the task changes to Rejected. They have the option to submit a reason on why they rejected the task.
- Canceled - The task is shown with this status when you cancel the task.
- Archived - When you archive a Task it is hidden from the main view of your other Tasks
- Under Review - From the talent view when they ‘Mark as completed’ the task is 'Under Review' for the Task Manager to review the work completed.
How to create a Task and Project?
Creating a Project
Let's use the example of a simple website design project and associated tasks:
Project name: Website Design
Associated tasks could include:
• Content Determination
• Design
• Development (this could include milestones of providing a few samples to choose from, draft site build, final design sign-off, final build, etc.)
• SEO Review
• QA Testing
- Step 1: In the Tasks & Projects module, click “Create New Project” in the top-right corner.
- Step 2: Add Content
- Project name
- Project description (optional)
- Start/End date (optional)
- Budget (optional)
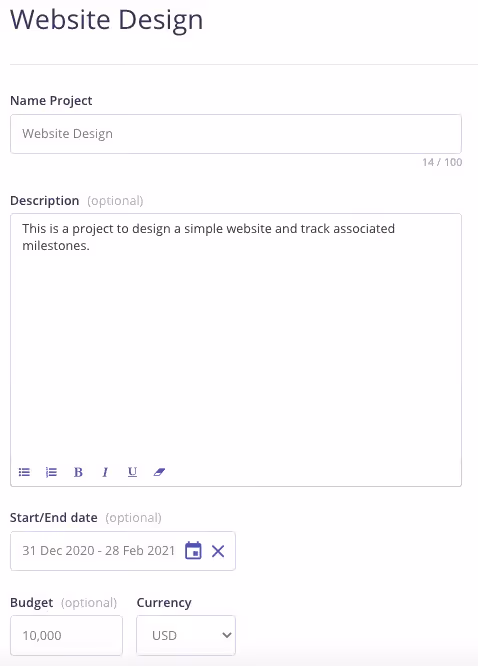
- You can use the project timeline and budget to accurately track the overall progress of the collection of associated tasks.
- Your project will be saved as a Draft until tasks are added.

Creating a Task
- Step 1: Click into the Project where you will add a Task
- Step 2: Add Content
- Task name
- Task managers (these are individuals within your internal team)
- Task description
- Start/End date
- Assigned talent (once you start typing a name or email, matching options will appear)
- Fee information
- The task will be saved in the Draft state until you set it to Live. Once you make it live the status will change to “Pending” and an email notification will be sent out to the talent to either Accept, Reject, or Review the task.

Exercise
- Create a new Project and name it.
- Create at least 2 Tasks within the Project and fill out the brief/assignment details.